
Everybody who’s heard me talk about my T962 oven knows I’m not exactly pleased with it. I eventually figured out how to make that oven perform (by lying about timing and using extra thermocouples, fixing leaks and adding insulation), but it’s design flaws to do with air leaks and lack of convective flow, etc, make it pretty much hopeless for more than one small, well-positioned board at a time.
I finally took Chip McClelland’s advice and started to build a new oven, using his ex-apartment appliance Black and Decker toaster oven in combination with Peter Easton’s “ControLeo2” kit. Chip has always referred to the project as the “Easy Bake Oven”, and I’m totally OK with this: it’s just going to take a while to reproduce the “paint scheme”. Or maybe the livery will follow the “Queasy Bake Oven” design I found on the ‘Net (oriented toward boys’ creation of things like gummy worms).
Note: Iff you’re just glancing at this and considering getting and using the ControLeo2 kit I have some advice:
0) I personally think it would not be prudent to go to all the trouble of making a high performance oven by using the small, no-convection version of the B&D toaster oven as a starting point. Instead, see if you can negotiate a custom kit from Peter Easton that lacks the 300 watt heater and boom mat material (don’t need it) but replaces that with the extra gold reflective tape needed to fully cover the larger B&D convection oven.
1) Force yourself to read **EVERYTHING** at whizoo.com and linked from whizoo.com (most especially the *ControLeo2* firmware source code and its change log). Critical information is hanging out in surprising places, and (in my opinion. Again, a key detail to notice is that the little oven that’s the focus of the how-to is a *bad choice*. Notice whether your unit’s firmware is up to date. Consider an upgrade if the bug list for your version is intolerable (and then do upgrade it when you want to make a change that justifies the hazards of the freaking board’s bootloader being damaged, as happened to me!)
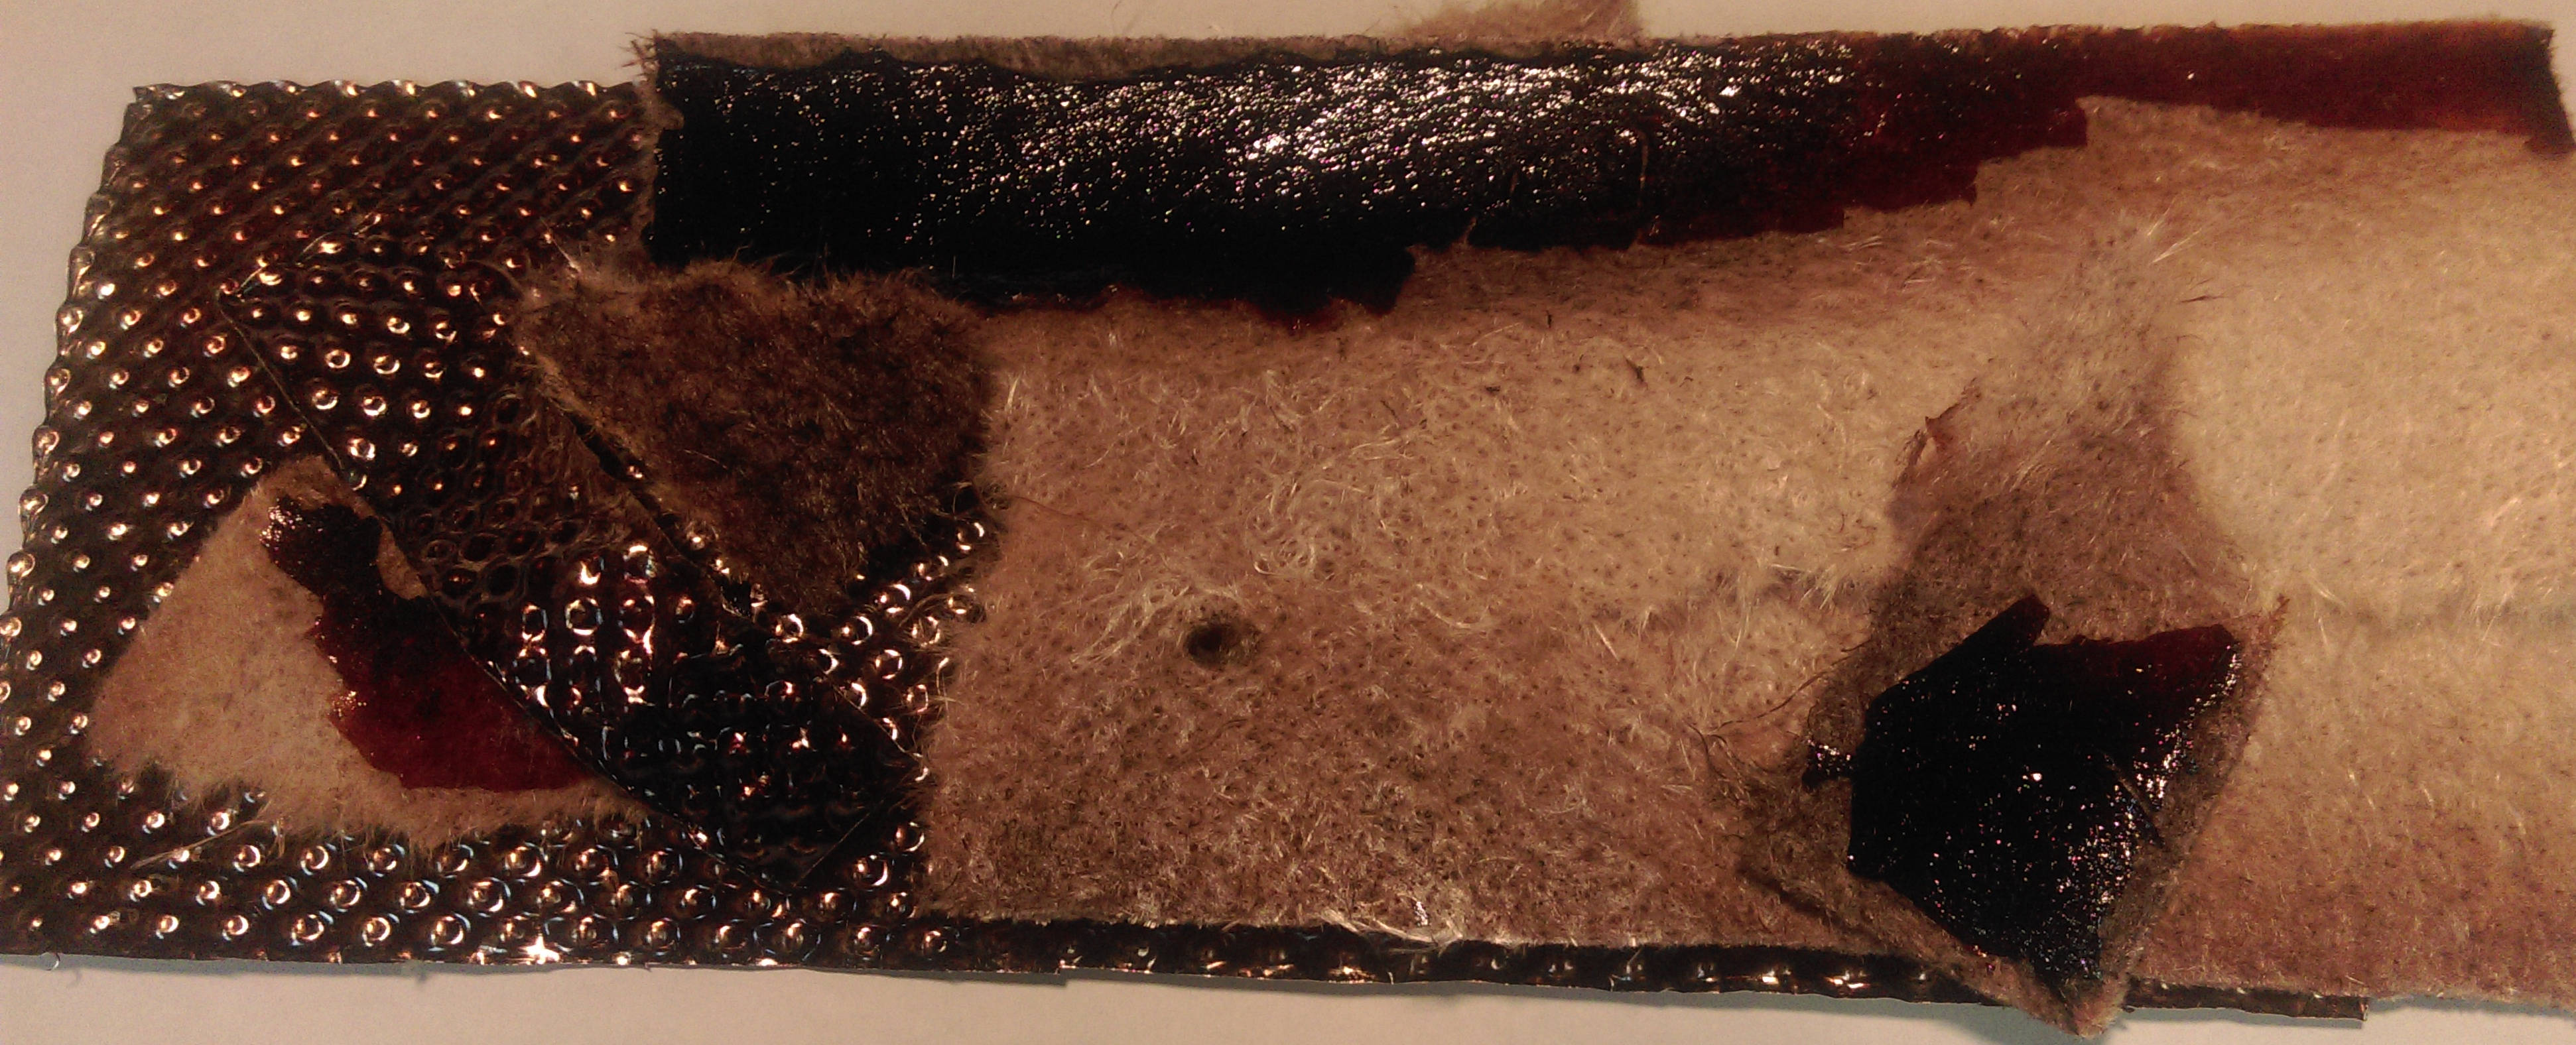
2) DO NOT put the supplied boom mat in the oven if you aren’t using it to insulate the extra, 300 watt heating element supplied with the full kit (needed by the little, dumb oven but irrelevant to the proper, larger, convective oven). Just ignore it. The boom mat will disintegrate into a local ecological and nasal disaster area if you try to use it and it gets over-heated. (Picture of what happens if you overheat this stuff below).
I got the ControLeo2 “full kit” without any proper due dilligence except I did wait until the original (Kickstarter) ControLeo project was history and Peter Easton and company had redesigned the system to deal with various bits of experience with the first version.
My kit is designed for the small, non-convection oven and thus includes a surplus 300 watt heater, insulating “boom mat” and mounting hardware. It also had insufficient gold reflective material for covering the inside oven surfaces to boost efficiency.
I’d had it “up to here” with pure radiant heat that is unevenly distributed and so I ended up buying some additional metalized-reflective tape (car parts store) such that the entire inside surface of the oven is designed to reflect most IR from the ceramic heater elements back to further heat circulating air. For better or worse, I also used the much more serious heat shield material supplied to insulate most of the “ceiling” inside the oven, figuring that’s where heat will tend to concentrate. (MISTAKE! I got the worse results, so be sure to read more about this below!)
All but an outer frame of the original grill was removed and a 1/32″ piece of aluminum sits on the grill as a shelf with a large gap front and back and smaller (fraction of an inch) gap on right and left. Little machine screws and nuts creating “feet” on the edge of the aluminum shelf combine with a thin aluminum tube sticking out the back of the shelf to allow the shelf to sit in exactly the same position whenever inside the oven.
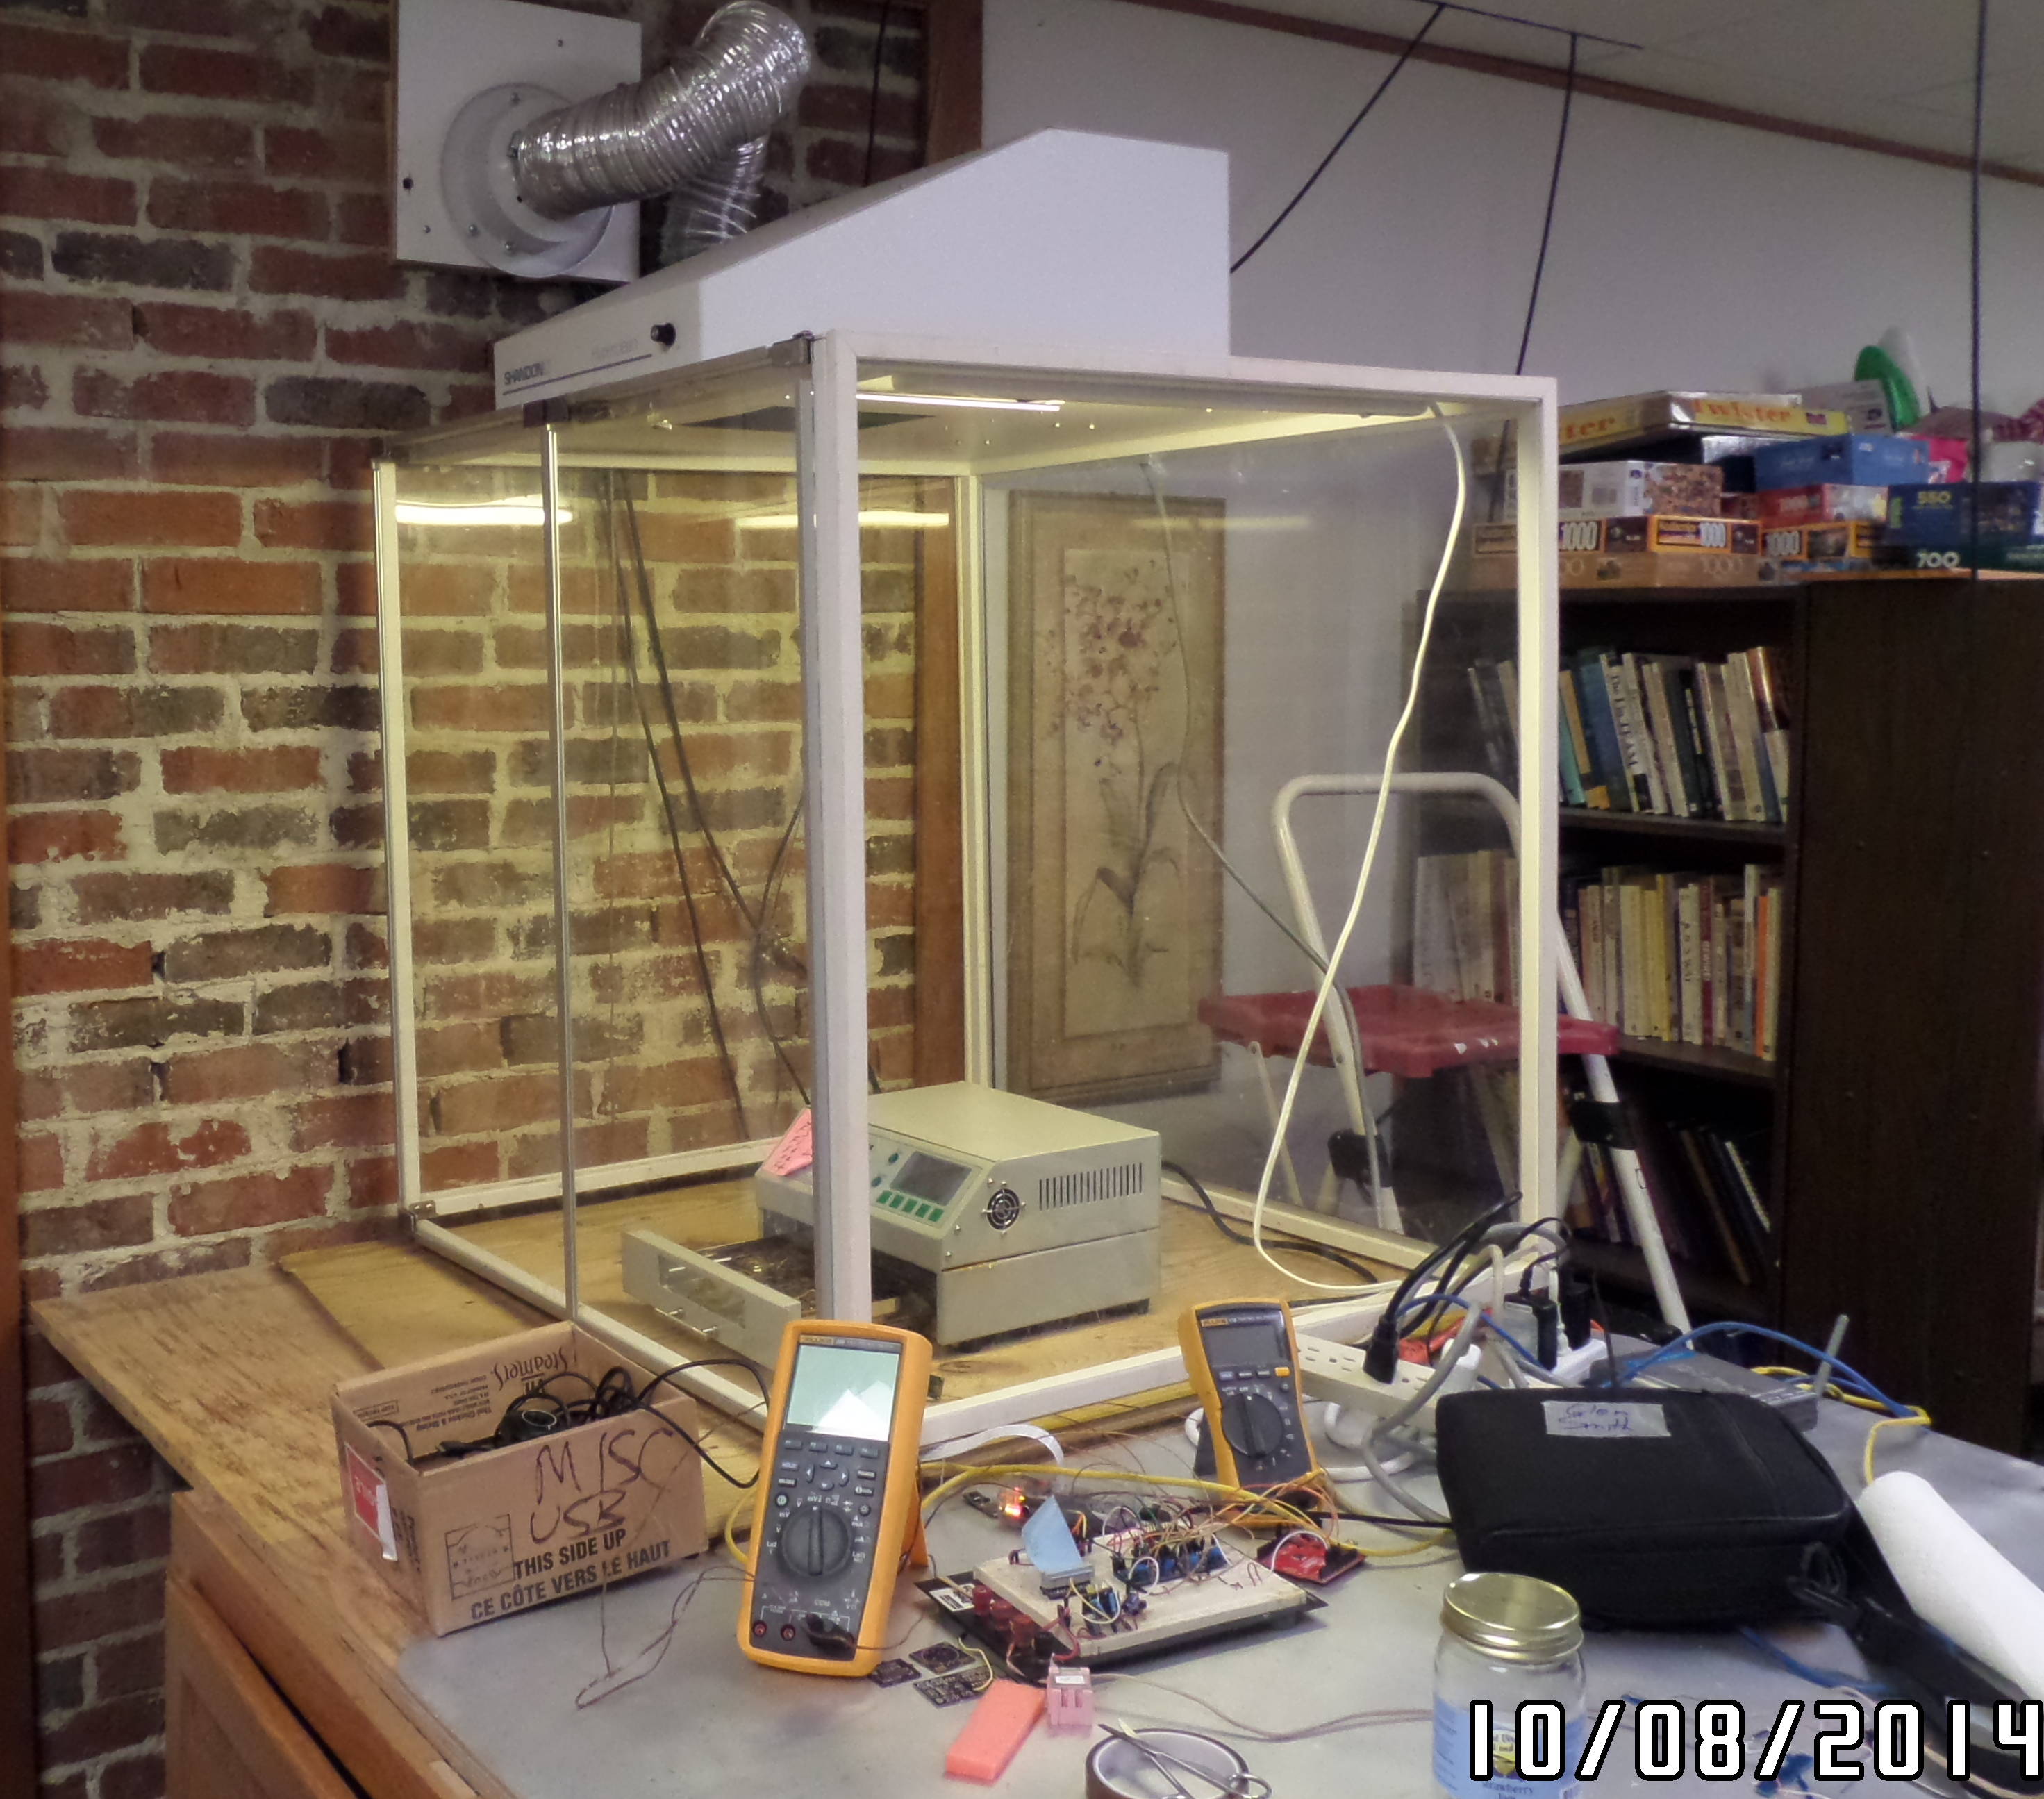
Here’s what the oven looks like now (yes, I’m *very careful* with the exposed electrical connections!)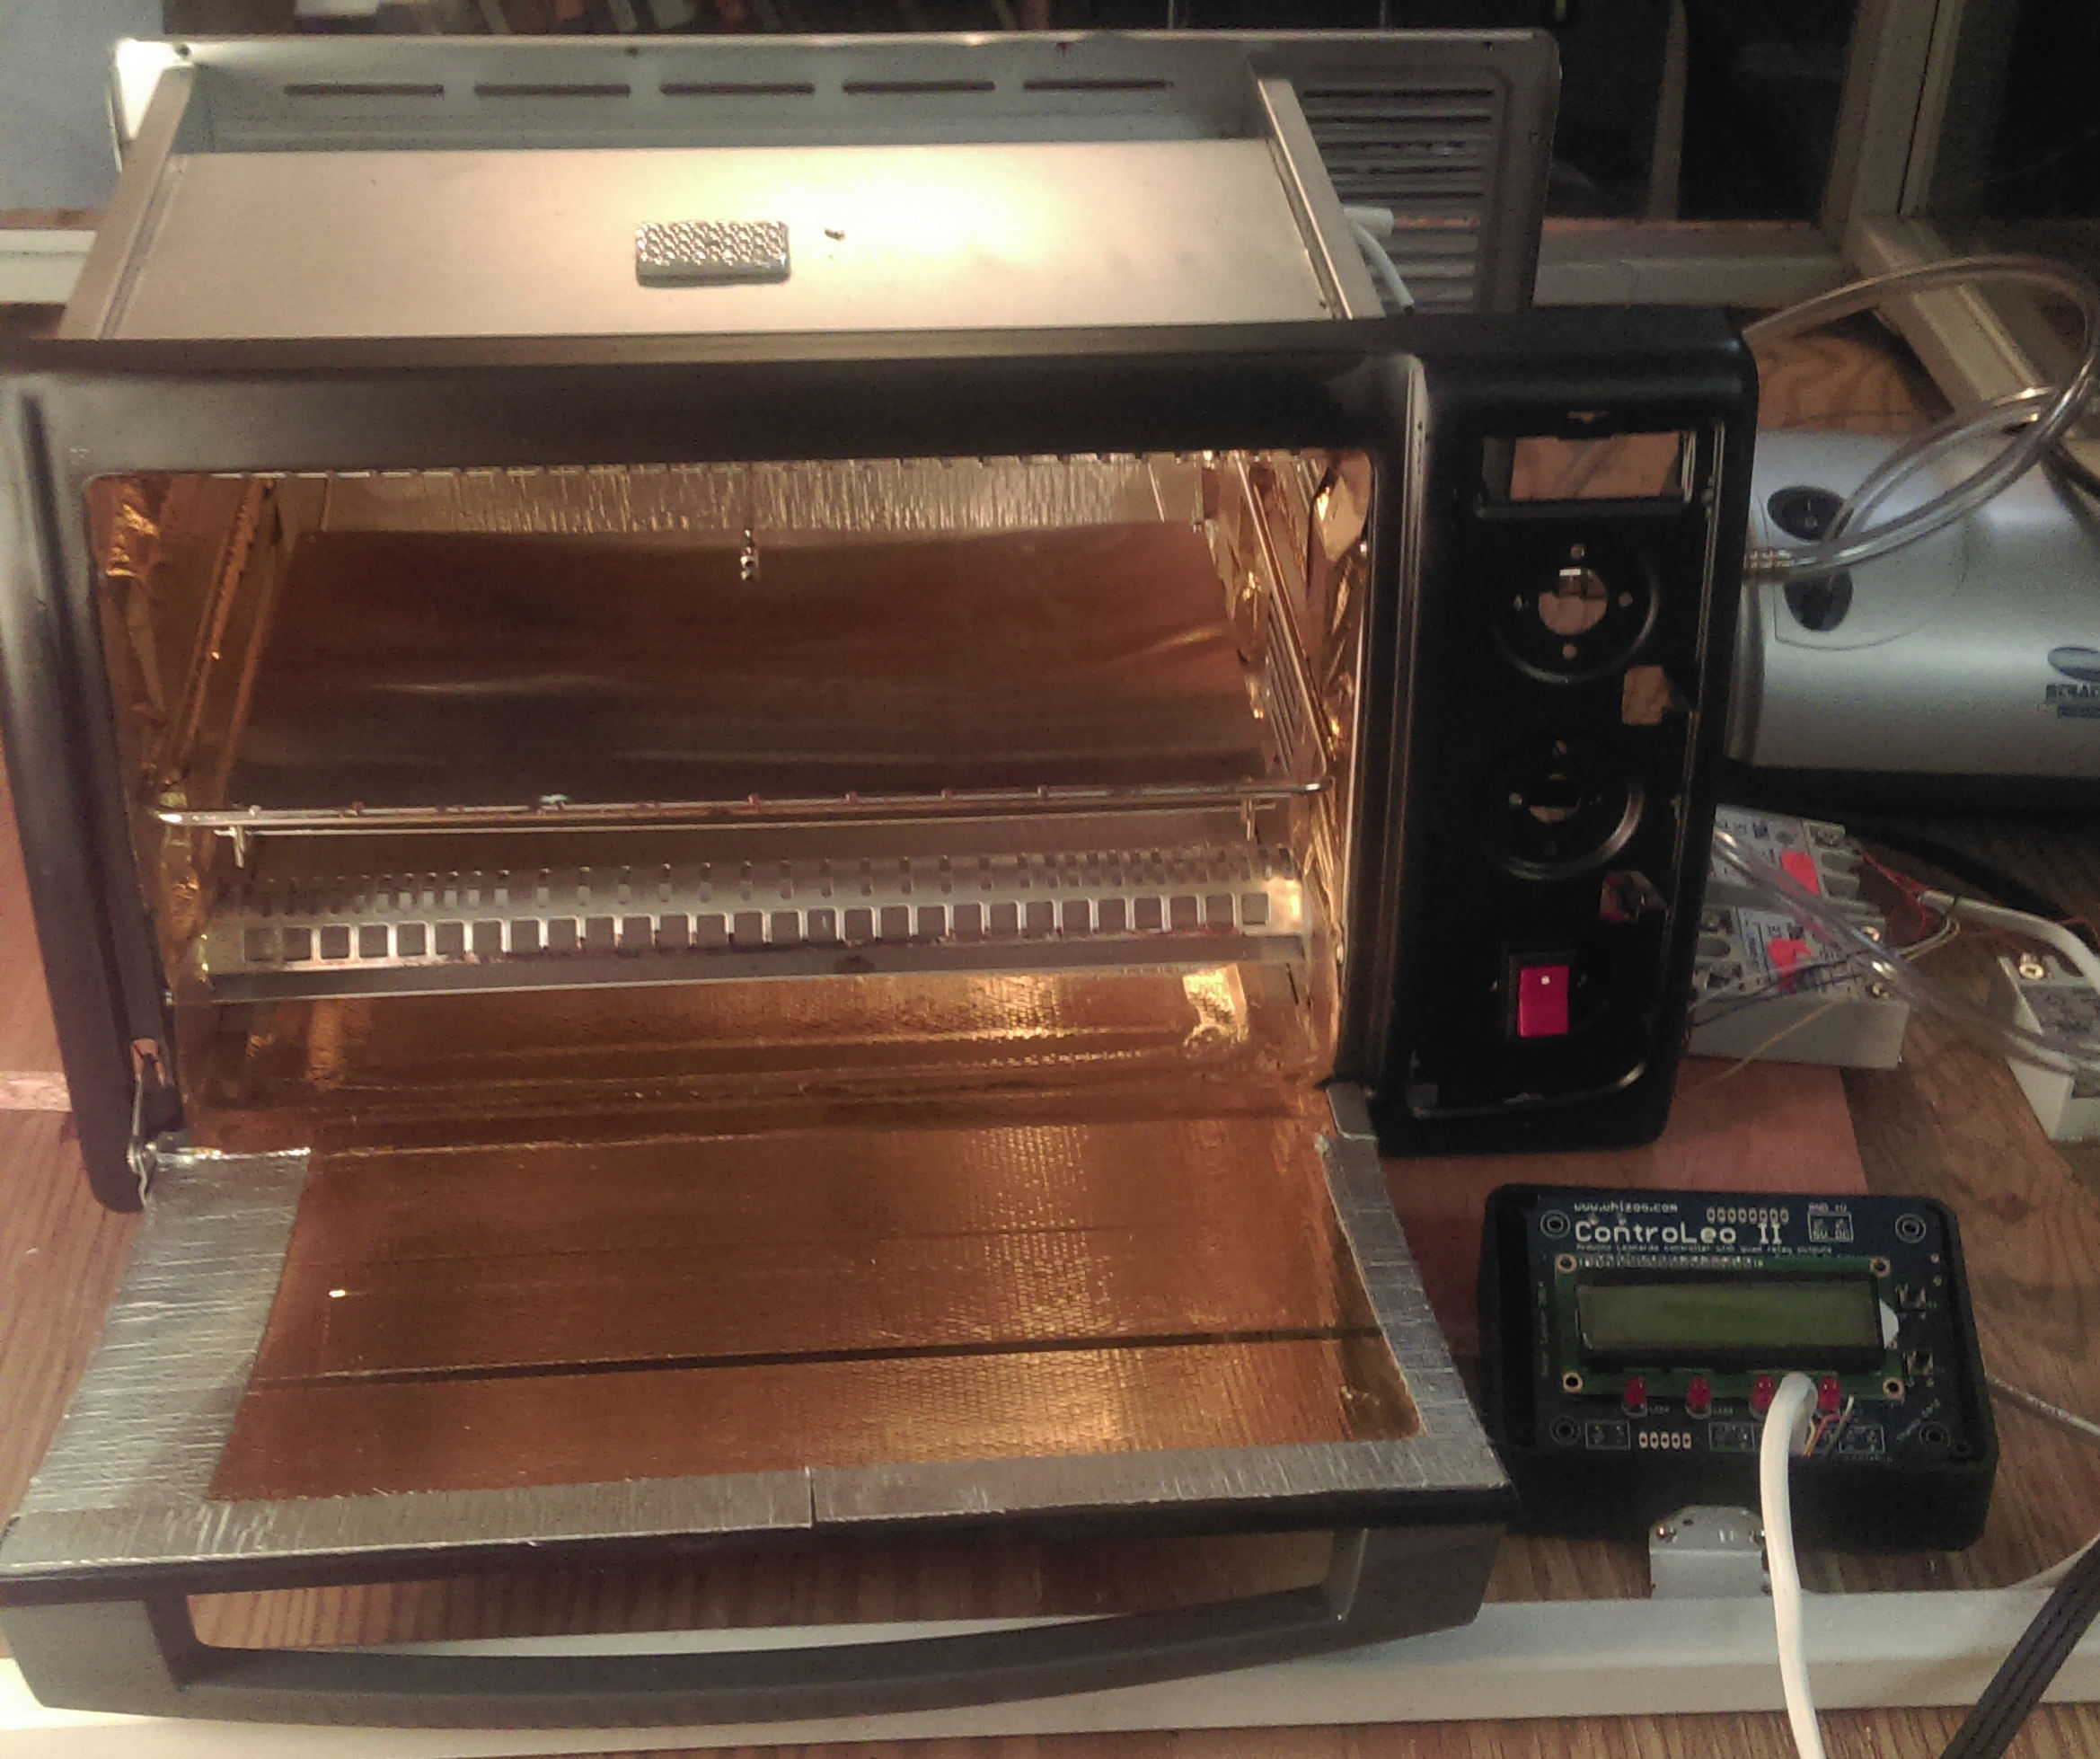
^^^^^^^ (air pump)
Tests with a collection of a dozen PCBs (without paste or components) totalling about 16 square inches made it clear this oven will get the job done on the heating side. It has a great deal more heating capacity than what’s needed to bring this collection of boards up to temperature, suggesting that a 4×4″ (10x10cm) board loaded up with components will be heated to reflow temperatures quickly and accurately. It might easily do a 4×8 or larger board: I’m still conducting “sea trials” and collecting data. But with almost exactly twice the wattage of the T962 and about .02{13079d06258ef9010cea88dee32f3cdfc6f216a54651010f7303ce6140ee927c} of the air leaks of the Chinese oven, I think the heating side is now entirely down to improving the control software performance. I’m two revs back from current software, so I won’t judge this aspect until I’ve upgraded.
One of the two SSRs controlling power to the elements failed after a few hours of use. I didn’t notice it and, in accord with Murphy’s Stinking Law, this happened during the time the oven was training itself. The result was that the oven trained itself to an extreme and still couldn’t get enough heat to meet minimum profile requirements. Only then (duh) did I notice that half the elements were not heating. Swapping the SSR fixed that, but the very, VERY long series of cycles to retrain the controller was annoying.
UPDATE: Putting the rectangle of “boom mat” on the oven ceiling to “put the best insulation on what will surely be the surface that might loose the most heat” was a terrible mistake. It decomposed and disintegrated and some of the fibreglass melted, all the while creating a terrible smell that leaked out of my fume hood when the door was open. And, sure enough, there is some of the notes on the ‘Web to do with ControLeo2 is a remark to the effect that it was a major mistake to put this stuff on the upper inside surface of the oven. Live and learn. But it will be a while before I get this cleaned out. Gotta wear a mask and scrape the remaining material off while wearing rubber gloves (the glass particles will get into your skin!) and running the vacuum cleaner. This is what baked boom mat looks like:
I soldered a few boards with the as-received (rev 1.1) firmware after getting the controller retrained following the SSR replacement. It worked great twice, but once the solder paste hadn’t even been melted. Looking at the logs later it was clear a bogus thermocouple fault had aborted the session. This was clearly documented in the firmware change log (duh) and when the firmware is updated that problem will go away.
The big issue with this setup is with cooling. There is no mechanism for proper cooling rates in the kit as received. So board/component temperatures stick around reflow temperatures for way, way too long without kludgy, random screwing around with the oven door. This is worrisome, as dumping the (relatively) freezing cold air from outside the oven onto boards sitting at 220-250C is a very bad idea. Servo support code in the latest ControLeo2 firmware will improve this situation slightly after I’ve hooked up a servo motor.
The larger realization was that the abandonment of PID from the ControLeo2 firmware will force me to treat this board as a temporary solution. I just can’t tolerate the predictable and very unpleasant side effects of switching from a light to heavy PCB load with the current algorithms in the ControLeo2. That is, the heating and cooling of the larger PCB load will severely lead or lag because the control algorithm just knows how to bump it’s duty cycles for the few heating/cooling phases by one small increment in a post-hoc, “I’ll get it better the next time” way. Ugh.
So my work on this is split into “now vs later”. For now I’m upgrading to latest firmware with the intention to add support for some commands via the board’s serial I/O port (and changing the serial output format to create nice, neatly formatted CSV files to drive my Python graphing programs). I’ll use the firmware support for a servo-actuator that can open the oven door, while expecting I might need to tweak this.
Aside: I wish this next bit was the result of some fantastic silly episode with wiring or electrical connection or the like, but the bootloader corruption that happened to me came between recompile/download #10 and #11 as I was talking with a friend on the phone. With download #10 I was putting a trivial program in place to cycle the oven to try to bake out the bad smell (before discovering it was the disintegration of the boom mat). Download #11 was just tweaking the duty cycle of the heating elements. Except the download failed because there was no longer a serial device corresponding to the Leonardo board. I moved the board to two other computer systems: same problem. The bootloader was corrupted. I soldered a six pin header on the board (note to Peter Easton while I’m trying to remember to send it via email: the placement of the ICSP header with respect to being “under” the LCD display makes soldering *VERY PAINFUL*). Anyway, I was able to put the boot loader back into the chip with my Atmel programmer and loop back to the usual compiler/programmer tools that talk to the board via USB. This episode deeply shook my confidence in the stability of the ControLeo2 board’s design from an electronics (e.g. noise) point of view, but I hope it will turn out to have a more reasonable solution. (The heating elements and convection fan had no mains power and the only things connected to the Leonardo were three SSRs, one TC, and the USB programming cable.
But “later” the control will be via a Raspberry Pi on my LAN. The RPI will be taking still and motion pictures of the soldering process by peaking through the oven door glass, while it also has more than enough power to apply some PID techniques to thread the temperature as close as possible to suggested profiles for the paste being used. The ControLeo2 board will be retired at this point to maybe bring up another oven.
For additional cooling I’m arranging to later on blow outside air into the convection fan chamber (you can see the plumbing in the photo above, along with a nebulizer pump that will provide the cold air. The intent is for this to mate with a hole in the convection fan path with very high temperature gasket material. The PID code will control the oven door opening, starting with a tiny crack while “puffs” of outside air are mixed in to hopefully get but even cooling. Or at least that’s the theory.
With multiple thermocouple sensors monitoring temperatures in a few different areas just above the PCB shelf I’m aiming at creating a “figure of merit” for each heating/cooling session by computing the “volume under the curve” as time is X, temperature is Y, and the TC sensor forms the Z axis of an actual result. The “ideal” will effectively be a solid where X and Y conform to the factory recommended profile and Z remains constant (the solid is “flat across the top”). So by integrating volumes under the curve as measurements are collected both the accuracy in terms of matching profiles for a given TC and the consistency of matches across multiple TCs can be computed into a single number such as a Chi-square of actual vs optimal volumes across the integrations. There will be plenty of room for developing this metric over time (and no doubt the professional PCB industry has already done this exercise in spades. But I love ignoring that and then seeing how cool or goofus my invention is in comparison).
But what I’m really out to do is work out how to adjust for board size(s), mass, emissivity and whatever else I can easily measure and have that adjust the oven to get decent, highly predictable and reproducible results.
==== December 9, 2015 ====
 FLIR’s view of fan area (inside 220C)
It’s many months later and I’m just now turning attention back to the oven. The ControLeo2 with updated firmware has done excellent work soldering a lot of small individual boards and a few sets of small boards. I got so busy with other projects I found it easier to just carefully crack the oven door open to accelerate cooling down to the pointer were I could fully open the door and blow a fan in to get ready for the next batch. So after all the bitching and moaning it’s eight months later and I’m just now focusing on improved cooling and controller plans.
The extremely poor rate and control of the cooling of the current setup was something that got a lot of thought last spring. Tom Rauschenbach (an old techie friend in the Dallas area) and I spent hours on the phone exploring ideas for improving the cooling process. We finally had an interesting idea the first week of April and this is sort of documented by the oven picture above: notice the gray gadget on the right with the plastic tubing coming out of it. This is a nebulizer air pump. It turned out to be ineffective, but a more assertive source of compressed air pumped into the back of the convection fan chamber is doing the trick for pulling oven temps down at the rate recommended for proper reflow profiles. I’m moving forward with this approach now, plumbing the air through a solenoid valve and playing with air pressure values and door-opening rates with the goal of more closely matching recommended profiles. (I’m implementing the servo-controlled door opener exactly as Peter Easton’s current ControLeo2 design handles this).
The question that I haven’t answered yet is how even the cooling is with air blown into the convection path (or even whether heating/cooling is relatively even in general!) The fan in the B&D oven creates a very noticeable vacuum on the inlet side and blows air out the other side at a fair rate, so I’m hoping that the stream of (relatively icy cold) room temperature air bounces around close to the fan blade and mixes pretty well with the hot air stream so the exit stream back into the oven chamber doesn’t have “pockets” of different temperature. I now have seven thermocouples to play with to try to answer the question of just how uniform the temperature changes inside the oven really are. These will be split between roles for measuring the air as well as various parts of PCBs during special tests. I’m still looking for a convenient way of arranging for a thermocouple to be held against the surface of a PCB without a lot of additional hardware, tape, etc. I’ve had very poor results with adhesives so far. My imagination spcs a bit of springy-wire with a few gram weight on one end that sits next to a PCB and a length of high temp plastic on the other that holds the end of a thermocouple against a PCB, but I haven’t tried to implement this idea yet.
Aside: The Atlantic Brew Supply store in Raleigh (in the same building as Raleigh Brewing) sells an assortment of type K thermocouples at reasonable prices. I got a pair like these with very nice long connecting cables for $12 each:
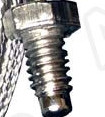
The plan is to use a pair of these for slow but stable indication of temperature inside the oven while the five small/fast thermocouples provide more precision.
I should also mention that assigning a Raspberry Pi to the task of low level control of the oven is going to stay “pushed out” on my roadmap. The ControLeo2 board (a modified Arduino Leonardo) should be just fine for handling the lowest level of control and measurement as long as I can get to enough of the Atmega pins and there are no big conflicts. The ControLeo2 uses the same SPI thermocouple chip I had been using, and I added a 2×3 ICSP header so access to the SPI bus should not be a problem. Additional digital pins are already brought out to the board edges and easily accessible. In the worst case I can tack connections to the analog pins if they aren’t brought out somewhere (haven’t taken the time to look at the schematic).
The remaining question is whether I can fit alternative controller code in “along side” the regular ControLeo2 code and have the initialization code look at a switch-controlled input and just branch to one main routine or another. Alternatively I’d just switch out the entire board for an alternative such as a Yourduino RoboRed. I need to be able to use the Controlleo2 as is until I’m ready to make a permanent change. The oven will very soon be “buttoned up” with just a female DB9 exposing the control signals for the SSRs and a FET circuit for switching 12 volts DC to the solenoid valve. (Why didn’t I just use the third, unused SSR and a 110v solenoid valve? I have no good answer for that!) So at the moment I’ll probably put one more toggle switch on the oven front and have it supply ground to one of the DB9 pins as a high level mode switch, if I can just do an either/or with the firmware code that runs after a toggle switch sense.
A Raspberry Pi has been on the “other end” of the ControLeo2 from the get go, monitoring serial output so Chip McClelland and I can make permanent logs of soldering runs. With the switch to new PID-based controller code monitoring (and switching between) additional thermocouples and on the fly PID changes can easily be managed by a Linux system either wired or wirelessly connected to the Controlleo2 or RoboRed board.
I’m settled on the final arrangement of the oven parts to describe the planned layout. A thin strip of metal or plastic across the right side of the oven will cover the cut-out sheet metal for controls and indicators. From bottom to top there will be an AC power switch, an AC pilot light, the DB9 controller connector (too much hassle to put it on the back), the above-mentioned mode toggle switch, and a handful of LED indicators that show when the heating elements, air valve and door opener servo are operating. One two-color LED will show the overall state of the inside of the oven:
- Green – close enough to room temp to start a new bake
- Green rapid blinking – Cycle in progress but still OK to abort (kind of like “V1” during an airplane takeoff)
- Red rapid flashing – Cycle in progress, keep your hands in your pockets if you don’t like SMT rework!
- Red flashing slowly – Cycle done but not at all safe to remove boards
- Red – warmer than room temp but not dangerous to touch and OK to open door/remove boards. (Proceeds to solid green after further cooling)
One other thing that deserves mention. I thought I’d published details of my fume hood somewhere, but I can’t find it. Here’s my hood, a Shandon Hyperclean (model 9990602) with the old Chinese oven in it:
There is a large, nearly unused carbon filter in the top of this hood, but the vent is also routed to a house chimney vent. In addition to the hood’s exhaust fan there is a larger 240v fan in the chimney vent that is meant to get the fumes all the way to the top. There is never any detectable odor from the operation of my reflow ovens with this hood in place.
I’ll report more results and add photos, etc, and hopefully sooner than eight months from now!
In the meantime, here’s a collection of thermal image photos of the B&D oven taken with a FLIR 165 (pseudo-imager). Notice the heat leaking out of the “cracks” where the oven door meets the oven (unevenly: an assembly defect or something makes the gap wider on the right side). Also notice the huge leakage of heat where the heating element wires are attached in four places on each end of the oven. I’m tempted to squirt a dab of high temperature automotive gasket making goo into these holes. The convection fan is inside a chamber in the middle of one end of the oven and it was surprising to see the outside of this chamber only about 50C when the main part of the oven was at 220C (but I’m still learning about emissivity with this FLIR and wouldn’t be surprised if this measurement was off by a mile). Finally, notice with picture 17 that the convection fan area of the inside of the oven (the one spot this cheap FLIR provides an absolute temp measurement for) is downright cold compared to the rest of the oven just after the door is opened at peak temperature.
Hi,
I’ve just come across this blog entry (May 18th, 2015). It makes for very interesting reading, and I’m definitely in favor of sharing knowledge about DIY reflow ovens. I’d like to clarify or explain some of the comments you made.
1. The small B&D oven actually works very well, but the kit I supply work with a variety of ovens. You can always ask me for help in selecting an oven, and negotiate what your kit contains. The kit now includes 18′ of gold tape, where it previously was 15′.
2. There is a lot of information in my build guide, and in the firmware release notes on GitHub. Even if you choose a different controller or oven, or want to build your own controller you should read it. I have over 500 customers using ControLeo/ControLeo2 and I’m always getting feedback from them to improve my firmware, build kit and build guide. As developed as this product is, I regard it as a work-in-progress and don’t hesitate to refine and improve it.
3. Boom Mat has to be used correctly. The aluminum part is very good at wicking away heat and distributing it across its surface. Unfortunately the polymer insulation is not very heat tolerant, neither is the adhesive backing. To avoid problems you must use large pieces, and don’t use it where gravity will be an issue. The build guide has it on the bottom of the oven, and it is excellent when used here.
4. The build kit now includes a servo, so cooling happens automatically. Thank-you to everyone who asked for this!
5. The difference in thermal mass between a “light” load and “heavy” PCB load is minimal, when viewed in the context of the thermal mass of the oven chamber and the aluminum or copper PCB tray. That is not to say that ControLeo2’s firmware is perfect, but it is open-source. PID controllers have their own set of issues too.
Lastly, I want to apologize for the trouble you has with the bootloader. I haven’t had a customer experience this before and it would’ve been nice to have had the opportunity to diagnose it further. I use pogo pins when programming the bootloader, but I can see how it can be difficult to solder a header onto the board.
Regards,
Peter
Thanks very much for taking the time to clarify things and improve perspective on this subject!
Here are a few comments corresponding to your numbered ones:
1. Your offer of custom kits to handle special case oven details is terrific. This would obviously be painful if every other customer wanted something special, but I assume it might evolve into a few variations as the special cases make a pattern. I should mention that you offered to sell me a length of gold tape to deal with my shortfall. I do intend to take you up on this once I’ve got the crud scraped off my “roof” and established how much I need.
However, for me the whole point of making a new oven is to get convective heating (and relatively little air leakage and an extensible control system). I simply went off half-cocked by buying the smaller oven without studying it properly. I don’t doubt that the smaller, fanless oven works very well for others. But I need my new oven to work in an “amazingly amazing” fashion with respect to evenness of heating and repeatability.
2. Personal issues have kept me from turning attention back to this project, but I do intend to do a lot of stuff with the current firmware version (tweaked a bit to satisfy my logging requirements) and I will jot down more impressions after reading more code and doc and getting some runs under my belt to try to keep my foot the proper distance from my mouth. However, my goals for this oven over the longer term are pretty enthusiastic and some of those goals will dictate moving past ad hoc control algorithms. I will document why I’m driven to get past this bald remark. And when you say “PID has it’s own set of problems” I don’t doubt that for a second. But I should proceed with more “data collection” before saying another word about this aspect.
3. Yep, I had already stuck the boom mat on the “roof” when I later saw your comment about avoiding that. My exact thought when I read your comment was “Oh no! This is not going to turn out well.” Getting the mat back off was out of the question (that adhesive sticks very, very well before it gets over-heated!) I decided to take my chances, and now I of course I wish I’d gotten a Dremel saw or something in there to cut up, pry and scrape the boom mat off before cooking it to destruction.
4. I played with emulation of the door-opening servo, have a motor and will be using this as soon as I can turn attention back to this project. I expect this to be tremendously effective for making the cool-down part of the oven cycle closer in speed to my T962 oven (i.e. rapid cooling is the *one* thing the T962 will do without doing anything but compensating for it’s crazy timekeeping errors!)
However, with all due respect, the door-opening scheme is not something I’d be tempted to use to handle temperature overshoot during the early parts of the reflow cycle. I put lot of thought into this problem and have a different approach in mind. I have all the pieces and parts in hand and when I can get some data from this approach I’ll share it.
4. It’s encouraging that the big/little board differences are not something to fret about. I guess the horrendous air leak issues with the T962 gave me a big bias in this area.
The placement of the ICSP header pads was not really that bad for me, but should you spin the board a different position would be better. But that boot failure was just crazy, and I don’t know whether to wish for it to happen again in the hopes of helping determine the failure mechanism or hoping it never happens to anybody else but me (and for me once was enough).
Best Regards,
Pete