“Smart machines interacting and communicating with other machines, objects, environments and infrastructures, resulting in volumes of data generated and processing of that data into useful actions that can ‘command and control’ things and make life much easier for human beings … similar to the world envisioned in the 1970s cartoon The Jetsons, only better.”
-Freescale, from their white paper “What the Internet of Things (IoT) Needs to Become a Reality”
With the introduction of the Raspberry Pi Pico , “Raspberry Pi” can now be thought of as a brand with two distinct product types. The Pico board features a Foundation-designed chip on a small board only needing header pins, offering an inexpensive but very powerful and versatile microcontroller suited for applications where Linux is less well suited.
With two M0+ Cortex cores, six independent banks of SRAM totaling 254KB, support for execute in place (XIP) from up to 16MB of outboard flash (2MB on the Pico board) at up to 133MHz, and support for variable clock rate and novel programmable I/O control, this is not your everyday low-end Cortex board. Below is a list of links to more details about Pico, its processor chip, firmware, software and tool chain, as well as the complete collection of related source repositories. (1/26/2021: Some host platform-specific tools are also included now. Thanks, Mike Fulbright!).
I have been working on this IOT thing for a while and wanted to share some details of my latest project. In using the data loggers, I have found that just as I need to be able to use different sensors, I also need to be able to support different methods of recording and reporting data. My first data logger used a MicroSD card for disconnected data collection. Then, I built a version which connected using a cellular network. For this next version, I used WiFi.
I started this project using the Atmel 328p but soon came to a realization, with WiFi, I needed more working memory and would need a more powerful chip. After some trial and error, I decided to use the wonderful Teensy 3.1 from PJRC. This is an Arduino compatible ARM processor with much more memory and speed.
The basic build contains the following components:
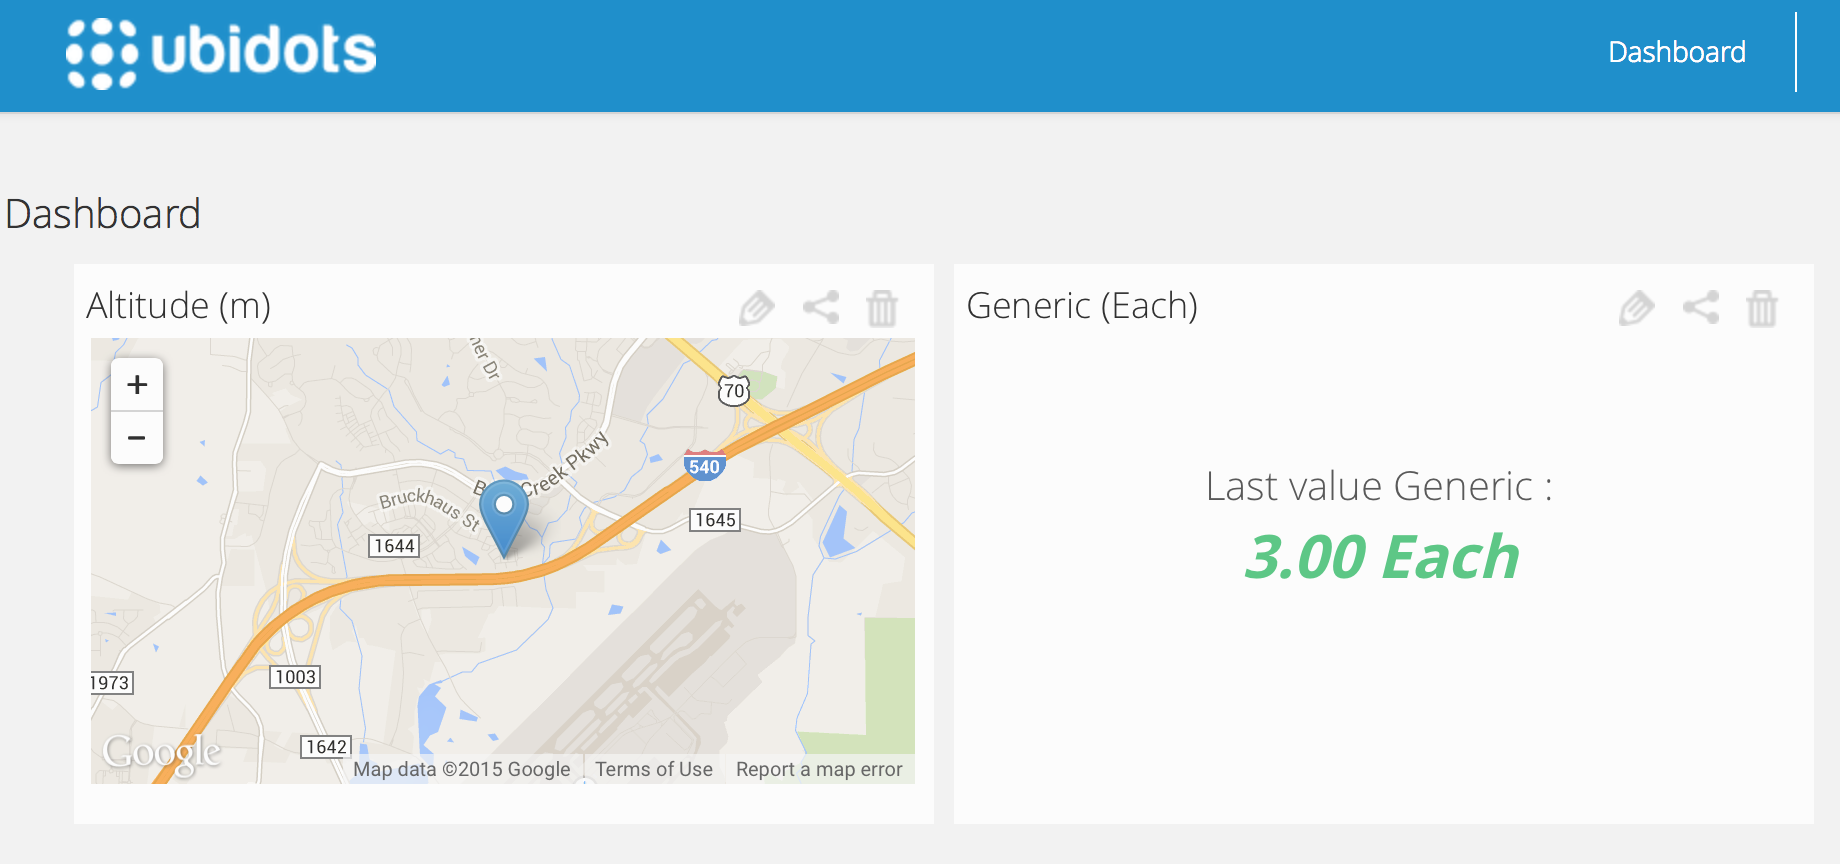
The basic idea is that this board will connect to GPS, obtain a GPS fix and report its location to Ubidots. Ubidots can then display this information in a number of ways including showing the location and the number of times the sensor had been moved that day as the dashboard below shows:
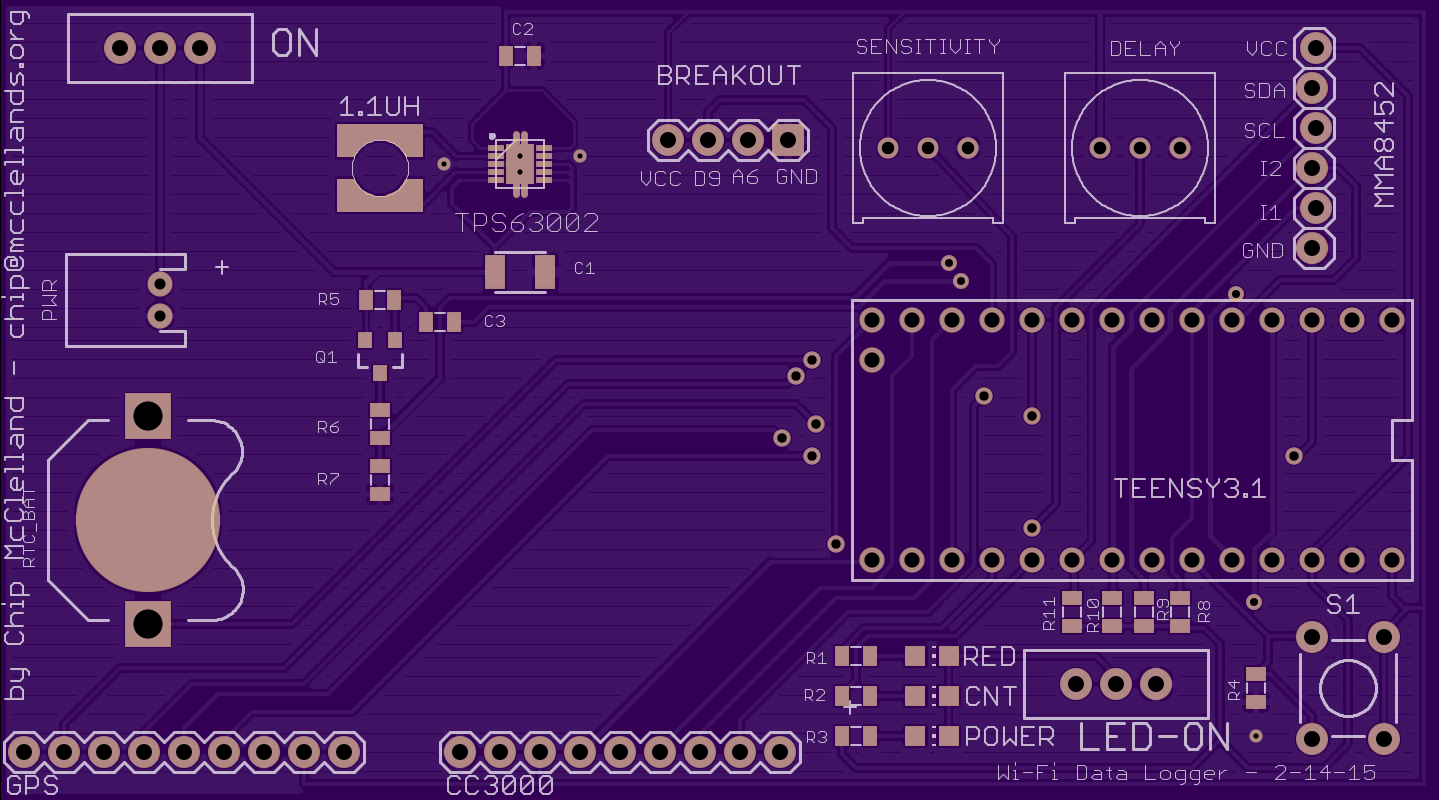
Here is the carrier board in detail:
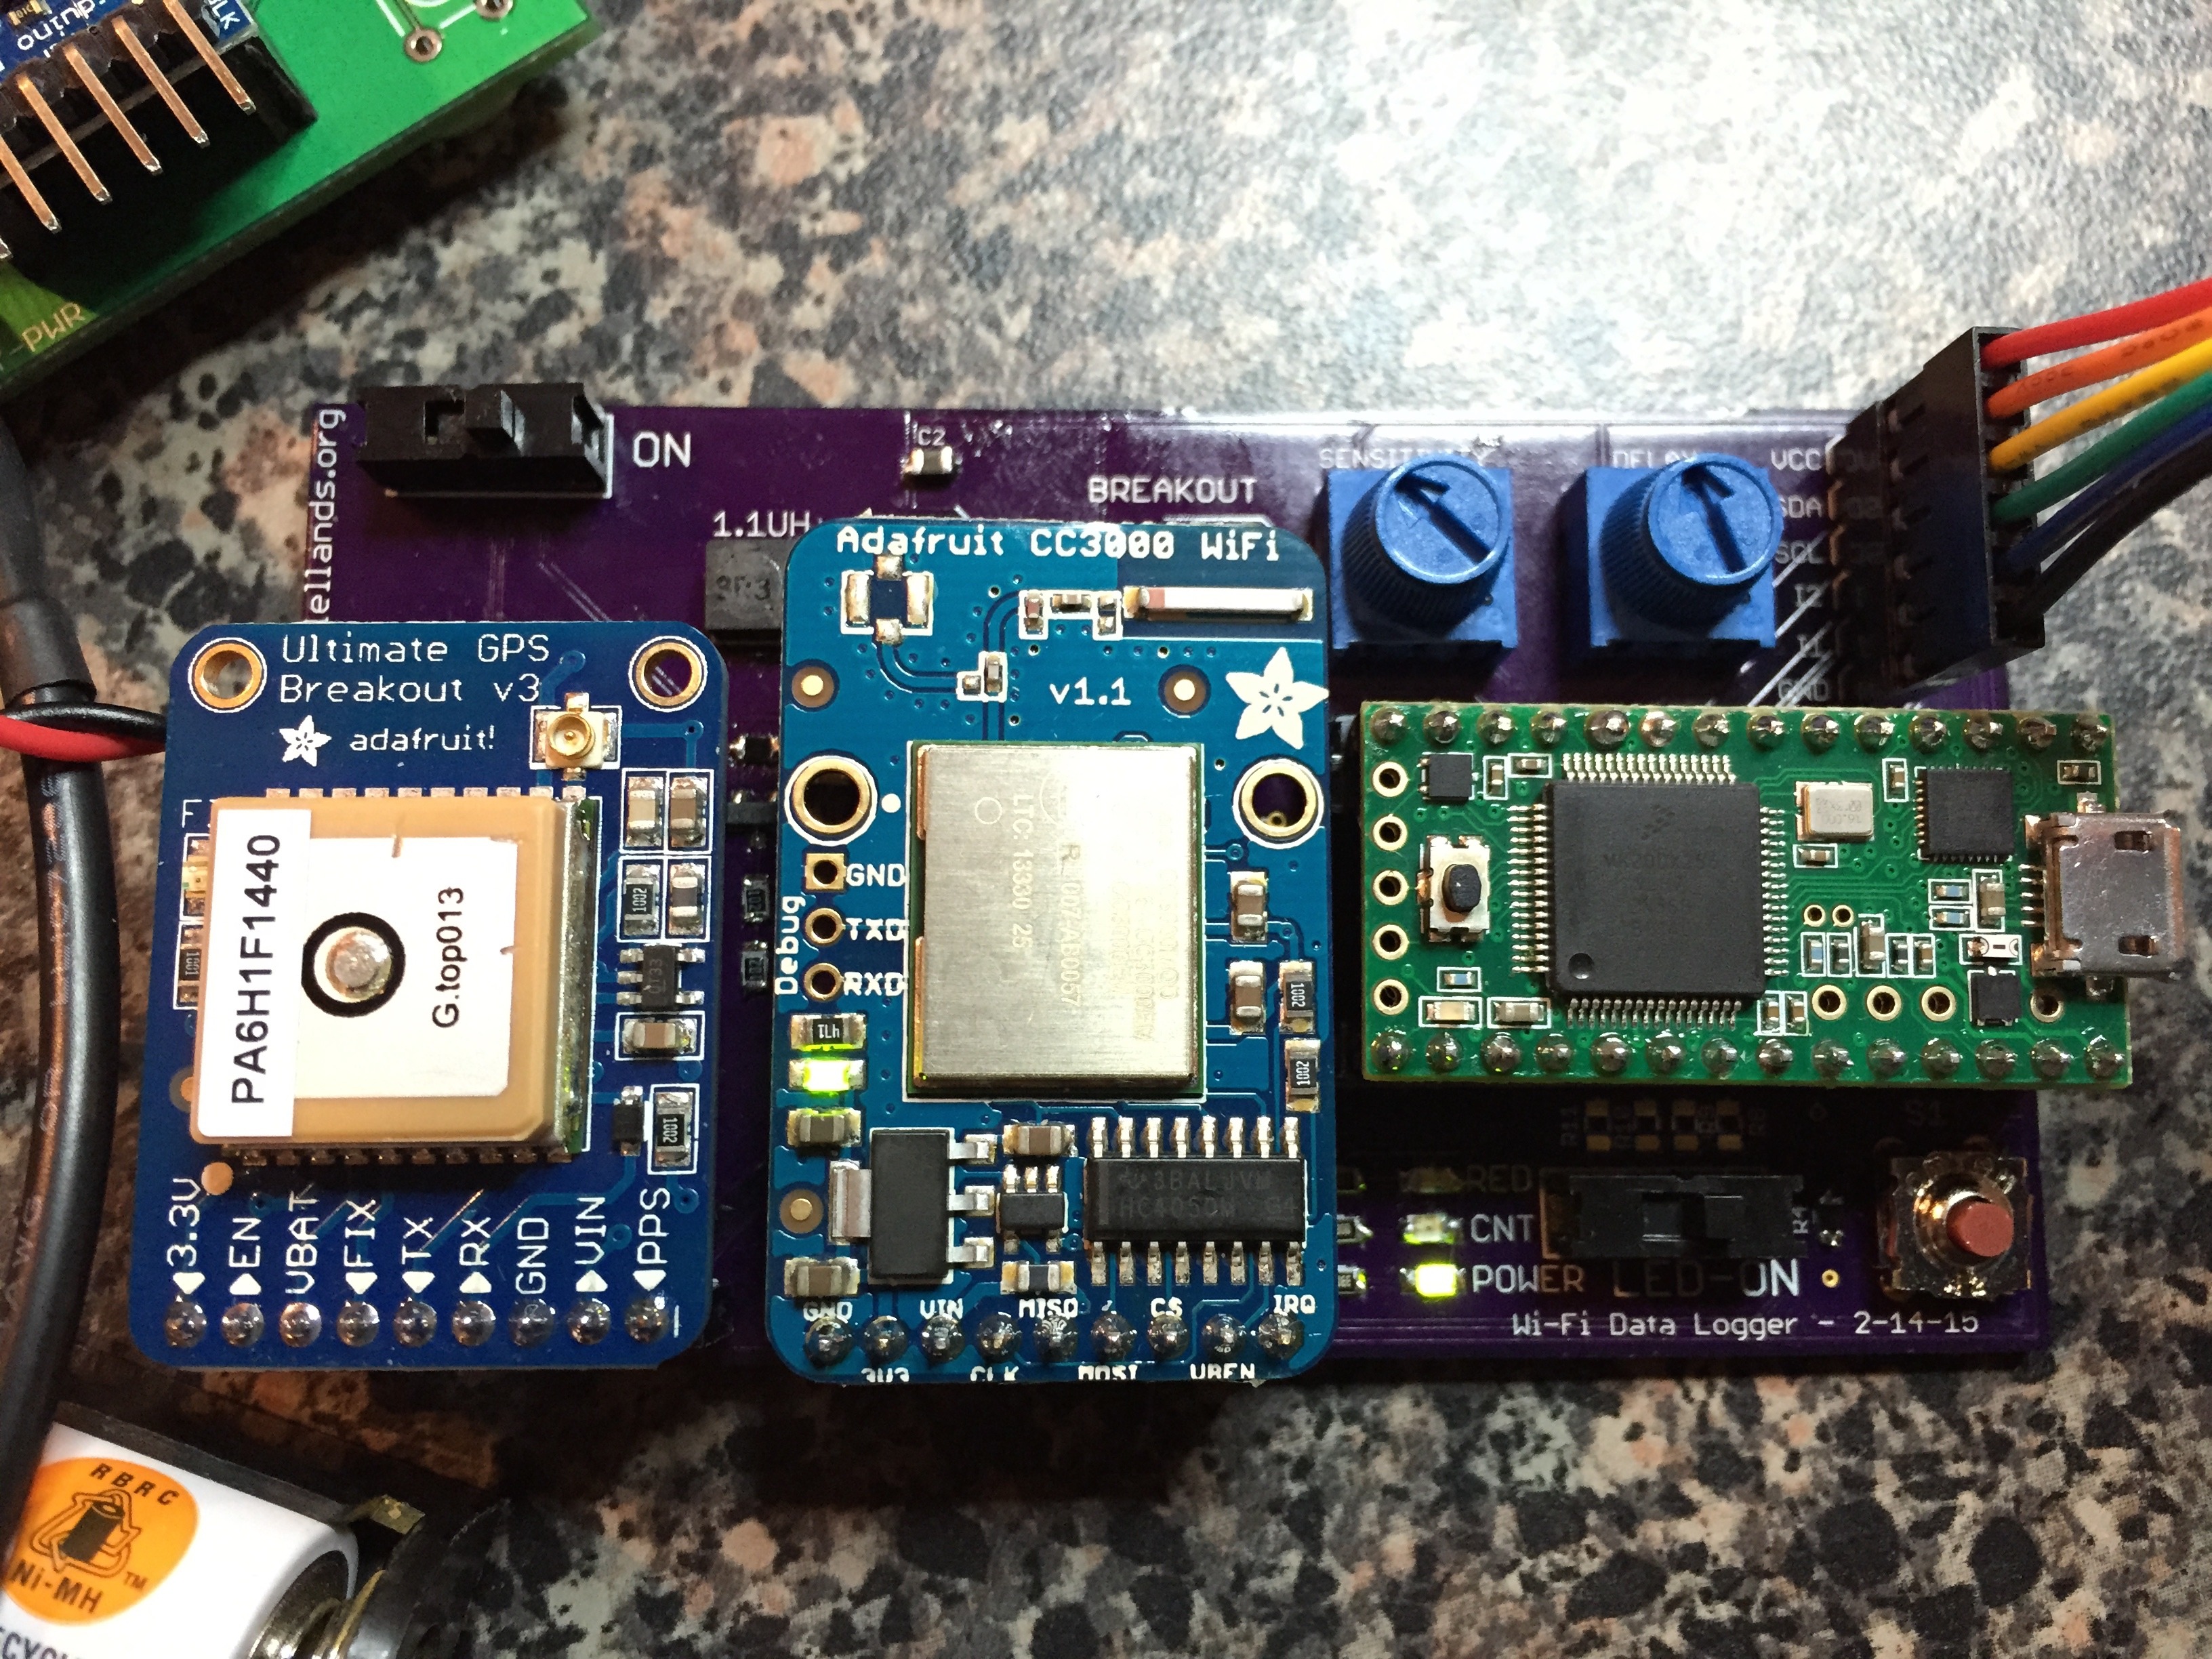
Here is what the basic board looks like:
Basic Board
And here it is inside its protective Pelican case:
I have posted the firmware sketch and the carrier board Design files to my Github repository.
I incorporated a very cool battery monitoring approach using a P-MOSFET to allow the data logger to monitor battery voltage and report it to Ubidots. While not as good as true fuel gauge, it should be easy to implement across various power sources. Thanks to Shane Trent for sharing this circuit on his excellent FET Tricks Blog. I have yet to implement this in the firmware but will leave that you to.
I have put some potentiometers and a momentary contact switch (held high) on the board for future use. One plan I have for the switch is to test for a button press at startup to select the WiFi network to use. The potentiometers are intended to adjust the sensitivity and reporting interval for the logger.
I added extra connections for power management – you should be able to turn off the WiFi and GPS modules to save power between reporting. The Teensy can be put to sleep as well and the accelerometer can wake it with the provided interrupt connection.
I also included the battery holder and header pin for using the Teensy’s integrated real time clock. You only need to add the battery and solder a crystal on the underside of the Teensy. This would enable you to set a regular reporting interval even if no movement is detected. Full instructions are provided here.
I hope this information is helpful. Please leave comments or contact me if you have questions. Also, you can follow me on Twitter @chipmc86 to hear about more over time.