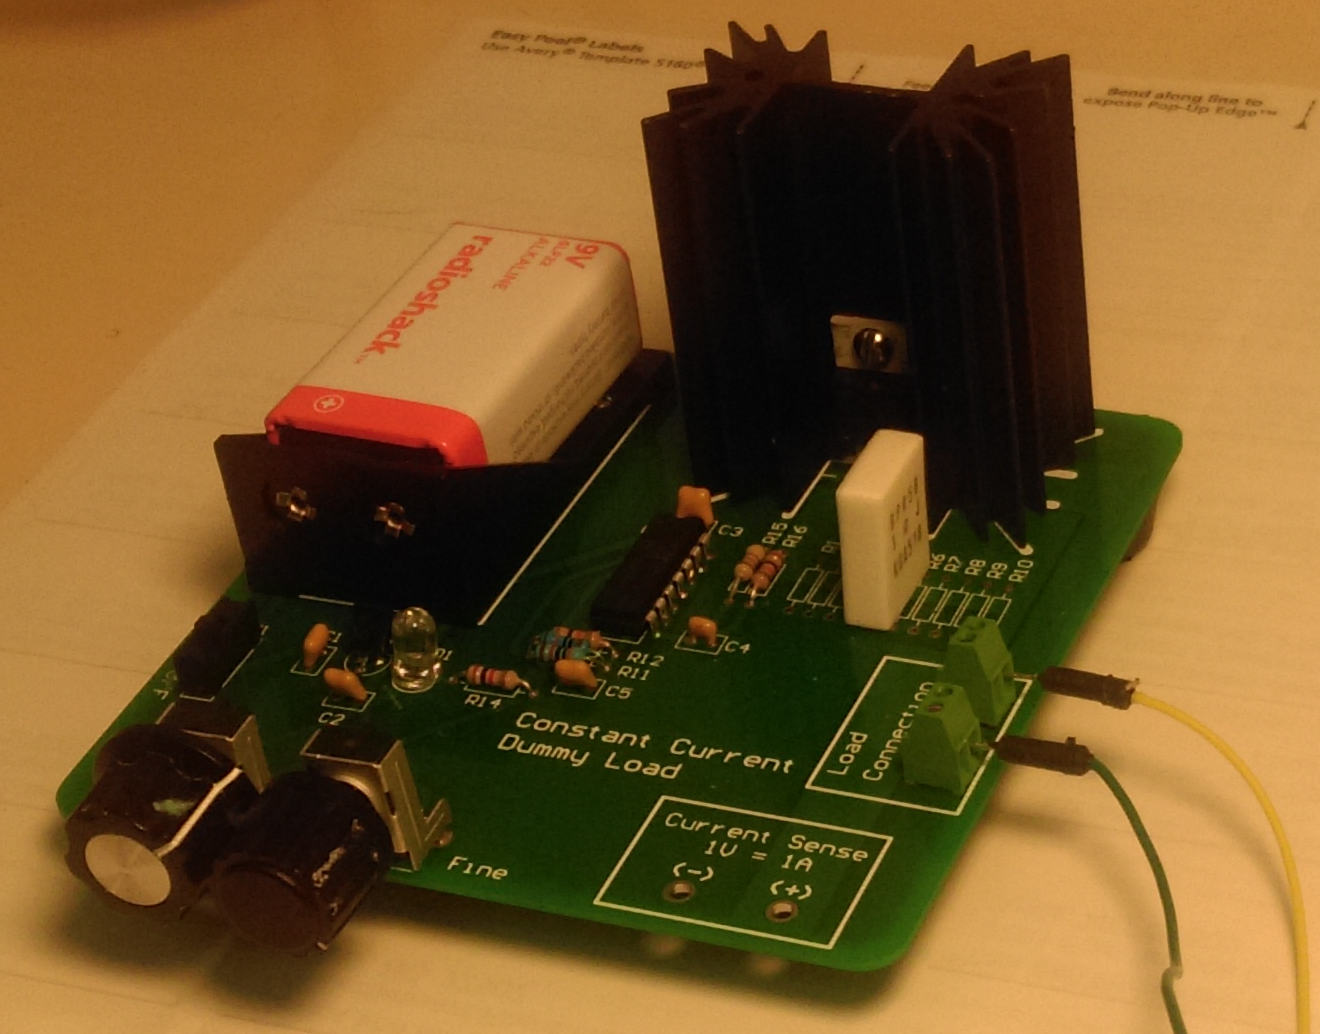
This is a constant current dummy load made from one of Shane Trent’s PCBs like those given away at a recent TriEmbed meeting. As mentioned on the email list, this PCB is a “fixed” version of a design from a “Sleepy Robot” blog of a guy named Wittenberg, which is itself a derivation of an original design by Dave Jones of EEVblog. Wittenberg had made available gerbers for his design (in early 2012) that were unfortunately defective, and he didn’t allow for two way communication, forcing Shane to go to great lengths to correct the gerbers and get a run of PCBs fabricated. Shane’s blog article covers all this in depth and has a link to the corrected gerber files in zip format.
Fast forwarding to the present, here’s a recent tutorial by Dave going into depth about battery measurements. Viewers will just have to put up with the axe-grinding, horse-beating treatment of a “battery life extender” Kickstarter that pushed Dave’s buttons. Apart from this, it’s an excellent treatment and a fantastic “essential subset” spreadsheet tutorial for folks that just want a hint about how to do cool things like the graph-making done in this video.
I assembled and tested a second of the PCBs recently. It will sink up to one amp at up to around the 60 volt limit of the FET used (MTP3055VL) HOWEVER, unless you like to see magic smoke the 18 watt thermal limit of the FET/heatsink assembly has to be honored. So at a full ampere the voltage limit is around 18, and at that load be sure to avoid touching the transistor! At one ampere the shunt resistor will be operating at it’s rated dissipation limit and will also be very hot. To summarize, this load has to be kept at an amp or less and at 18 watts of power dissipation or less. (Note: the shunt resistor is temporarily 5{13079d06258ef9010cea88dee32f3cdfc6f216a54651010f7303ce6140ee927c} tolerance due to an ordering blunder. That will be fixed.)
I’ve decided to make it available for borrowing by TriEmbed meeting attendees who can guarantee it’s return by them or their designee at the following month’s meeting. The transistor is not expensive and it won’t be any big disaster (just embarrassing) if it’s accidentally destroyed, but blowing the traces off the PCB will be frowned upon (joke). So this (and perhaps some of the TriEmbed contact cards Paul made, hallway signs, etc) could be part of a shared resource that could expand over time.
The “UI” is currently two voltmeter test points, with the unit showing the load current as a one to one mapping from amperes to volts. A digital display with simple USB serial (current and “external voltage” aka battery voltage) logging output and some temperature compensation/auto-calibration is planned, but it would be straight forward to tie the test points to something like an Arduino analog pin or two.
Remotely controlling and/or making the current limit programmable would be a bit harder, but a properly coordinated hack to provide an alternative control mechanism would be OK with me and make for a fun project for somebody.
Here are all the design-related links in one place:
Here are some BOM changes:
- The load connection is just four bare plated through holes intended to get some wire loops. These Newark 12H8386 screw terminals solder in and work well.
- As mentioned, a momentarily loose screw resulted in this Mouser part 660-MF1/4DCT52R10R0F five watt resistor being substituted for the default 10 1/4 watt resistors. The bad news is this resistor has a 350ppm/C coefficient as well as being only 5{13079d06258ef9010cea88dee32f3cdfc6f216a54651010f7303ce6140ee927c} tolerance. A better choice than either might be a pair of three watt, two ohm 1{13079d06258ef9010cea88dee32f3cdfc6f216a54651010f7303ce6140ee927c} Vishay resistors such as Mouser 71-RS02B2R000FE12. These have 50ppm/C coefficient so there would be about another 1/2{13079d06258ef9010cea88dee32f3cdfc6f216a54651010f7303ce6140ee927c} error at the point you could boil water on them.